
This HowTo will take you from a blank/brand new install of Ubuntu 20.04, 22.04, Linux Mint 21, KDE neon or Zorin OS up to the point where you can run OpenROAD to make a GDS-II file of an RTL design.
This HowTo is an update to the one I wrote last year, with some fairly significant simplifications due to improvements in the OpenRoad flow installation scripts.
I want to thank Ultramarine Linux for their lovely version of Fedora (which I’m using now). I should also mention that OpenRoad has scripts to install on Ubuntu, Centos, Mac, RHEL and openSuse, so these steps might work there, too; I’ve not tested all of them.
Note: this page was re-tested on a fresh install of KDE neon on the 1st Dec 2024.
Note: this page was re-tested in Feb 2026 in Ultramarine Linux using BoxBuddy (mentioned below). If you have BoxBuddy, it means that it doesn’t matter which distribution you install, you can still get an Ubuntu 24.04 shell.
Requirements
- 8GB RAM (16GB or more if you’re dealing with big designs)
- Minimum of 100Gb HDD (the install process peaks at 93GB, then drops off a bit)
If you’re using VirtualBox, you’ll want to set it to the maximum number of CPU cores in the green section, turn on Bidirectional copy/paste and file transfers, turn on 3D acceleration and use 64MB Video RAM (or more) if you’re using a screen larger than 1920×1080.
Folders
During this installation:
- The main tools are compiled in
~/Work/vlsi/tools, then installed onto the system at/usr/local - Magic VLSI ends up in
/opt/magic-8.3 - PDKs and cell libraries go into
/opt/pdks - OpenROAD and Yosys end up at:
~/Work/vlsi/tools/OpenROAD-flow-scripts/tools/install
Step 1: Install the OS
Ubuntu 20.04 or 22.04 from here: https://ubuntu.com/#download
or
Linux Mint 21 from here: https://www.linuxmint.com/download.php
or
Zorin OS from here: https://zorin.com/os/
or
You can install BoxBuddy on your system (or similar DistroBox-like tool) and spin up an Ubuntu 24.04 environment inside that to use here.
Install the OS and boot into it (or launch your BoxBuddy terminal).
Step 2: Update the System and Install the Basic Build Tools
Choose best/closest Apt mirror repository. On Mint, this is through the Update Manager -> Software Sources.
Once you’ve chosen the fastest local package repository, update your system.
sudo apt update && apt upgrade -y
Reboot.
sudo apt install -y build-essential
If you’re using VirtualBox, then Insert Guest Additions CD Image now and let it auto-run, then reboot.
If you are using a VM, you can copy/paste between the host and guest OS’es now. If you’re not using a VM, you might find it easier to install the SSH server daemon and connect to it for copy/paste.
Next: Install Python and Git.
sudo apt install -y python3-venv python3-pip python3-yaml git gitk
The default ‘sh‘ should be ‘bash‘, not ‘dash‘:
sudo rm /bin/sh && sudo ln -s /bin/bash /bin/sh
Finally, make an area to work in:
mkdir -p Work/vlsi/tools
Step 3: Install Yosys and OpenROAD using OpenROAD-flow-scripts
You can install Yosys and OpenROAD separately, but there’s a wrapper for the build process that does (almost) everything in the OpenROAD-flow-scripts repository. This section has been massively updated since the last post I wrote and it installs all dependencies (CMake, Boost libraries, Lemon, SWIG, Eigen), including KLayout.
cd ~/Work/vlsi/tools
git clone --recursive https://github.com/The-OpenROAD-Project/OpenROAD-flow-scripts
I’ve had some pretty hit-and-miss results when building from the master branch, so I recommend finding the latest tag and building off that.
cd ~/Work/vlsi/tools/OpenROAD-flow-scripts
git tag --sort=-creatordate
The most recent tag is the first one you see on the left. In this example, it’s 26Q1. Check-out the repo at that tag.
git checkout -B 26Q1
git submodule update --init --recursive
Step 3.1a (Zorin OS only): Tweak the dependencies
Before you can go any further, if you’re using Zorin OS, you’ll need to edit the Dependency Installer files to trick them into thinking you’re Ubuntu 20.04 (which is what Zorin 16.2 is based on).
There’s 2 of them:
OpenROAD-flow-scripts/etc/DependencyInstaller.sh
OpenROAD-flow-scripts/tools/OpenROAD/etc/DependencyInstaller.sh
Open each one in an editor and (near the bottom), look for the section that starts with:
case "${os}" in
Below it, copy the whole “Ubuntu” section and change the first two lines to read:
    "Zorin OS" )
        version="20.04"
In OpenROAD-flow-scripts/etc/DependencyInstaller.sh, the end result looks like this:
    "Zorin OS" )
        version="20.04"

 //  A copy of the rest of the Ubuntu section, finishing with the ";;"

        ;;
Once you’ve saved both files, you can run the setup.
Step 3.1b (KDE neon only): Tweak the dependencies
Before you can go any further, if you’re using KDE neon, you’ll need to edit the Dependency Installer files to trick them into thinking you’re Ubuntu 22.04 (which is what KDE neon is based on).
There’s 2 of them:
OpenROAD-flow-scripts/etc/DependencyInstaller.sh
OpenROAD-flow-scripts/tools/OpenROAD/etc/DependencyInstaller.sh
Open each one in an editor and (near the bottom), look for the section that starts with:
case "${os}" in
Below it, edit the "Ubuntu" line and add "| KDE neon". It will look like this:
"Ubuntu" | "KDE neon" )
Step 3.2 (for all OS’es): Setup and Install
cd ~/Work/vlsi/tools/OpenROAD-flow-scripts
sudo ./setup.sh
Wait a few minutes for that to finish, the run the build step (which takes quite a long time):
./build_openroad.sh --local
After about 30 minutes, that should complete without error.
Add the OpenRoad environment to a new shell-script. You can run source ~/.orrc from any new shell that you want to set up your environment.
# Update '.orrc' to point to the OpenROAD tools
printf '\n# Add Yosys and OpenROAD environment variables\n' >> ~/.orrc
printf 'source ~/Work/vlsi/tools/OpenROAD-flow-scripts/env.sh\n' >> ~/.orrc
Step 3.3 (for all OS’es): Test
There’s a huge amount of text that scrolls up the screen and it’s always worth testing the install to see that it went OK. Run the following commands:
source ./env.sh
yosys -help
openroad -help
Both of those should give command-line help about themselves.
Now, run a trial build:
cd flow
make
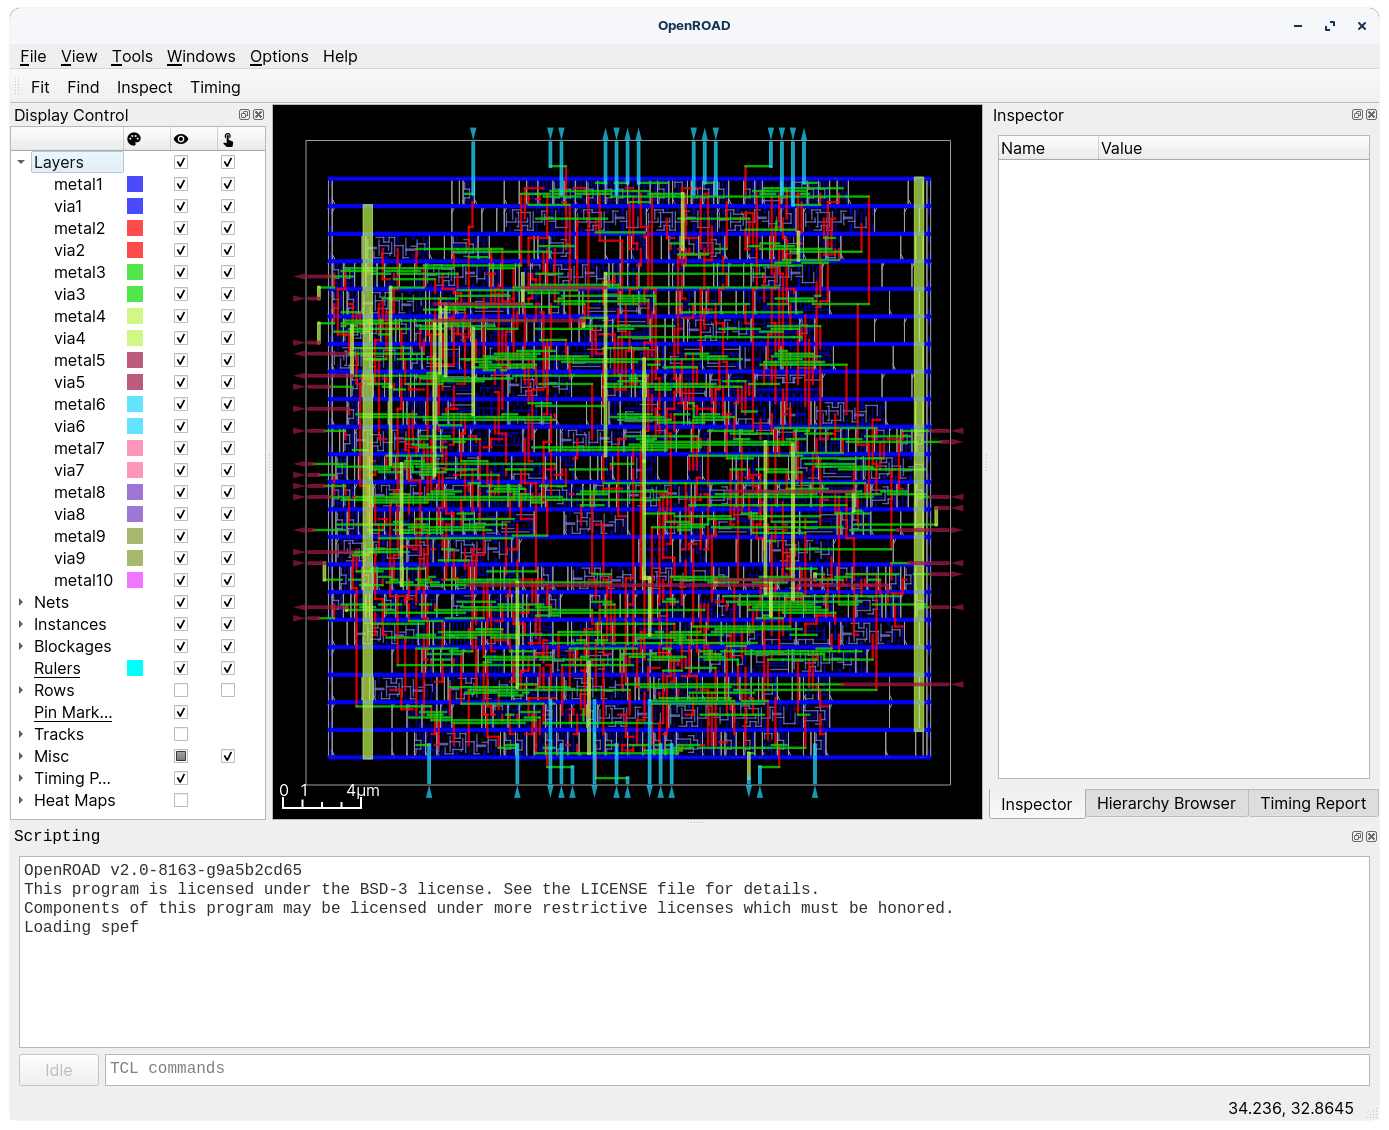
make gui_final
That should synthesise, place and route a sample design using the nangate45 process, and it should look something like this.

Step 4: Install Magic VLSI
Magic is a 30 year-old program and it’s still under active development on GitHub. Use these commands to install the most recent version:
# Install Magic VLSI
sudo apt install -y irsim csh tcsh tcl-dev tk-dev \
  libcairo2-dev mesa-common-dev
cd ~/Work/vlsi/tools && git clone https://github.com/RTimothyEdwards/magic
cd magic
./configure --prefix=/opt/magic-8.3
make
sudo make install
printf '\n# Add magic to the path\nPATH=/opt/magic-8.3/bin:$PATH\n' >> ~/.orrc
Note: That last line adds magic to your execution path, but you can’t type ‘magic‘ to launch it until you open a new shell. and type: source ~/.orrc.
Step 5: Set up OpenPDKs with SkyWater SKY130
By default, the standard cell libraries and SRAM samples are not enabled. I want everything so I can see the effects of running different cell libraries on power, performance and area (PPA). The lines below enable much more than the default. Full documentation for these options can be found here.
I’m not using the eFabless PDK folder structure (selected by the ‘--with-ef-style‘). This is apparently a minor tweak to the folder structure and affects how you load files into Magic, but it’s only for eFabless and not for general use.
mkdir -p ~/Work/vlsi/pdks && cd ~/Work/vlsi/pdks
git clone https://github.com/RTimothyEdwards/open_pdks && cd open_pdks
# Configure with both "A" and "B" versions of the PDK
./configure --enable-sky130-pdk --enable-sram-sky130 \
  --enable-osu-t12-sky130 --enable-osu-t15-sky130 --enable-osu-t18-sky130 \
  --enable-alpha-sky130 --prefix=/opt/pdks
make -j$(nproc)
# This step might fail with this error: "Solving environment: failed"
# If that happens, run it a second time and it will work(!)
make -j$(nproc)
# This step takes about 30 minutes
sudo make install
If you look in ‘/opt/pdks/share/‘, you’ll see 2x PDK folders: ‘sky130A‘ and ‘sky130B‘. The ‘sky130B‘ folder is newer (from open_pdks version 1.0.269) and includes support for ReRAM (a non-volatile RAM).
You can make the ‘sky130B‘ PDK available to Magic VLSI like this:
sudo ln -s /opt/pdks/share/pdk/sky130B/libs.tech/magic/* /opt/magic-8.3/lib/magic/sys
And you can also set Magic’s default configuration file to use the SKY130B settings, like this:
printf '\n# Add Skywater PDK magic configuration\nexport SKY130B=opt/pdks/share/pdk/sky130B\n' >> ~/.orrc
cp /opt/pdks/share/pdk/sky130B/libs.tech/magic/sky130B.magicrc ~/.magicrc
Last step; clean away unused install files:
make veryclean
Optional Step: Explore the Cell Library
You can explore the libraries in Magic now. There are several to choose from and they are named like alphabet soup. The page that describes what the letters mean is here.
Launch magic and point it to the ‘sky130A’ PDK:
magic -T sky130B
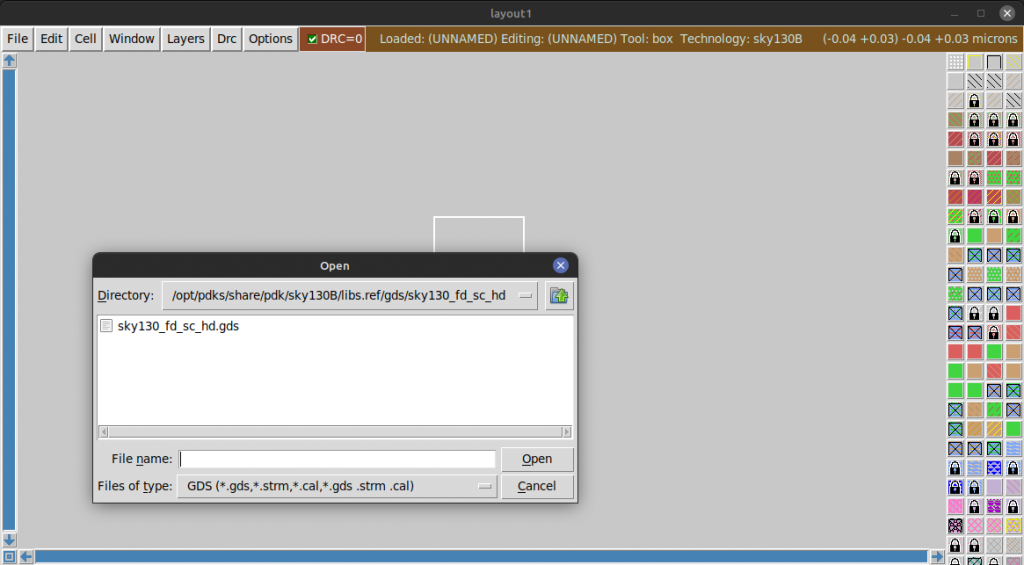
When Magic opens, you have 2 blank windows.
In the top, big one, choose File -> Read GDS, then navigate to ‘/opt/pdks/share/pdk/sky130B/libs.ref/gds/sky130_fd_sc_hd‘ and choose the ‘sky130_fd_sc_hd.gds‘ file.
Display the cell manager with ‘Options -> Cell Manager’.
Scroll through the list of cell types, pick one, then click ‘Load’ to see it.
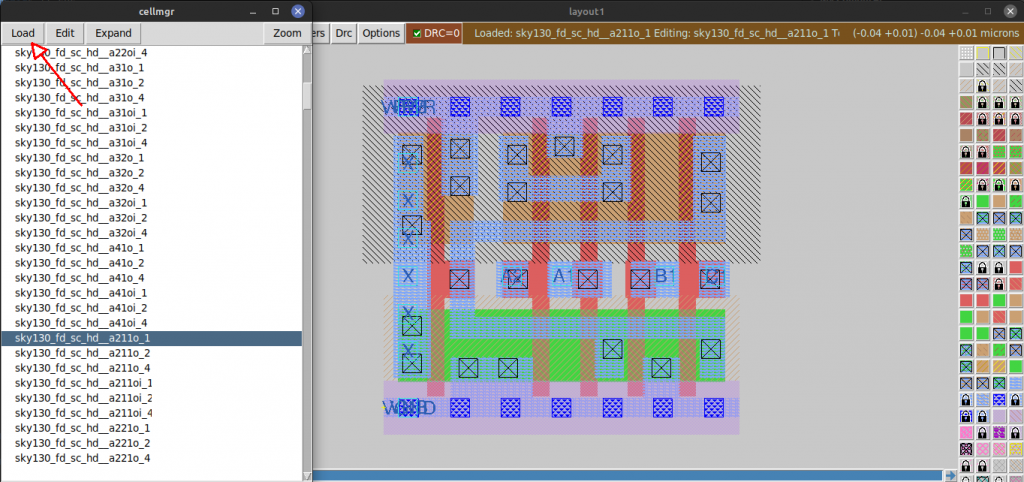
If you left-click on a track, then move the mouse a bit and right-click to make a rectangular selection area, you can repeatedly press ‘S’ to cycle through connected circuit elements.
Exit without saving by typing ‘q’ into the console, or selecting ‘File -> Quit’.
Step 6: Add VHDL to Yosys
If you want to add VHDL parsing to Yosys. Prerequisites are to install ‘gnat‘, then compile ‘ghdl‘.
sudo apt install -y gnat
cd ~/Work/vlsi/tools && git clone https://github.com/ghdl/ghdl.git && cd ghdl
./configure --prefix=/usr/local
make
sudo make install
Install the ghdl-yosys-plugin:
cd ~/Work/vlsi/tools && git clone https://github.com/ghdl/ghdl-yosys-plugin.git
cd ghdl-yosys-plugin
make
# The plugin's installer detects where 'yosys' is on your system,
#  then installs the plugin to the right folder.
make install
Test the plugin’s integration:
cd ~/Work/vlsi/tools/ghdl-yosys-plugin/examples/icestick/leds/
ghdl -a leds.vhdl
ghdl -a spin1.vhdl
yosys -m ghdl -p 'ghdl leds; synth_ice40 -json leds.json'
You should see something like this in the output:
2.47. Printing statistics.

=== leds ===

   Number of wires:                 25
   Number of wire bits:            130
   Number of public wires:          25
   Number of public wire bits:     130
   Number of memories:               0
   Number of memory bits:            0
   Number of processes:              0
   Number of cells:                 94
     SB_CARRY                       22
     SB_DFFE                         4
     SB_DFFESR                       2
     SB_DFFESS                       2
     SB_DFFSR                       24
     SB_LUT4                        40
Step 7: Test the Installation
OpenROAD is a bit hard to get into without any examples of the toolchain flow. The OpenROAD-flow-scripts repository has example designs, constraints and makefile flows.
Test your installation, according to the OpenROAD Flow Tutorial:
cd ~/Work/vlsi/tools/OpenROAD-flow-scripts/flow
make DESIGN_CONFIG=./designs/sky130hd/ibex/config.mk
# This process takes about 30 minutes
This builds the ‘ibex‘ 32-bit RISC-V CPU core and the results end up here:
~/Work/vlsi/tools/OpenROAD-flow-scripts/flow/results/sky130hd/ibex/base$
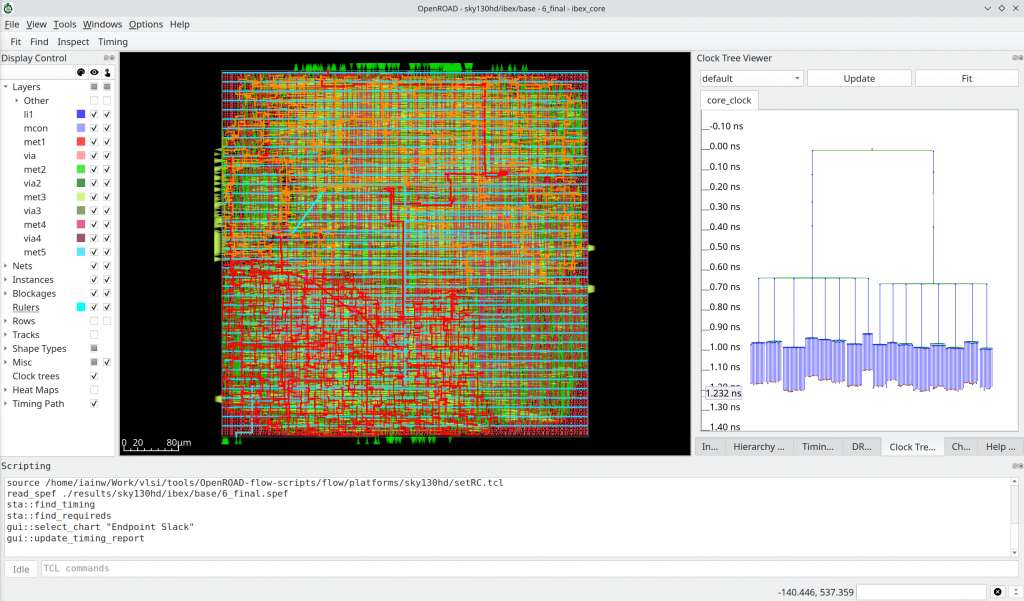
To see the results in OpenROAD’s GUI, type:
make DESIGN_CONFIG=./designs/sky130hd/ibex/config.mk gui_final
This can take up to 45 minutes on an 8th gen i7 machine.
The tutorial is fairly essential to understanding how to set up a project and build it, so it is worth reading.
(Optional) Step 8: Analog Design Tools
Analog design is made easier with the use of XSchem, XSschem-Gaw, ngspice and xyce.
If you’re going down this path, I recommend joining the open-source-silicon.dev Slack group.
Install netgen:
# Install netgen
cd ~/Work/vlsi/tools &&  git clone git://opencircuitdesign.com/netgen
cd netgen
./configure --prefix=/usr/local/
make
sudo make install
Install XSchem:
# Packages needed by XSchem
sudo apt install -y csh libx11-dev libxrender1 libxrender-dev libxcb1 libxaw7-dev \
  libx11-xcb-dev libcairo2 libcairo2-dev tcl8.6 tcl8.6-dev \
  tk8.6 tk8.6-dev flex bison libxpm4 libxpm-dev gawk adms \
  libreadline6-dev libjpeg-dev
# Install XSchem from source
cd ~/Work/vlsi/tools && git clone https://github.com/StefanSchippers/xschem.git
cd xschem
./configure --prefix=/opt/xschem
make
sudo make install
printf '\n# Add xschem to the path\nPATH=/opt/xschem/bin:$PATH\n' >> ~/.orrc
Install ngspice simulator:
# Install ngspice
cd ~/Work/vlsi/tools && git clone git://git.code.sf.net/p/ngspice/ngspice
cd ngspice
# The compile script also runs an install process to /usr/local
#  so this must be done with `sudo`.
sudo ./compile_linux.sh
There is another simulator, called ‘xyce’, which is about 10x faster than ngspice. The installation steps are fairly complex, but they are described here for those that want to try them.
XSchem-gaw is the graphical waveform viewer for XSchem simulations. Install it like this:
sudo apt install gettext libgtk-3-dev xterm gnuplot
cd ~/Work/vlsi/tools && git clone https://github.com/StefanSchippers/xschem-gaw.git
cd xschem-gaw
gettext -V
# Make a note of the version number; mine (Zorin) was 0.19
# If yours is "0.19.x", run the 'sed' line below
sed -i 's/0\.18/0\.19/' po/Makefile.in.in
# If yours is "0.20.x", run the 'sed' line below
sed -i 's/0\.18/0\.20/' po/Makefile.in.in
aclocal && automake --add-missing && autoconf
./configure --prefix=/opt/xschem-gaw
make
sudo make install
printf '\n# Add xschem-gaw to the path\nPATH=/opt/xschem-gaw/bin:$PATH\n' >> ~/.orrc
You probably want to have a toolbar for easier use. Enable it in ~/.xschem/xschemrc:
mkdir ~/.xschem
cp /opt/xschem/share/xschem/xschemrc ~/.xschem/xschemrc
printf '\n# Make the toolbar visible.\nset toolbar_visible 1\n' >> ~/.xschem/xschemrc
I recommend you look through the options in that file and see if there’s anything else you’d like to tune to your liking. The printf line above creates a duplicate of the set toolbar_visible 1 statement, so you could have just un-commented it for example.
To test it, run XSchem like this:
xschem
Choose File -> Open, then explore the SkyWater 130B PDk folder:
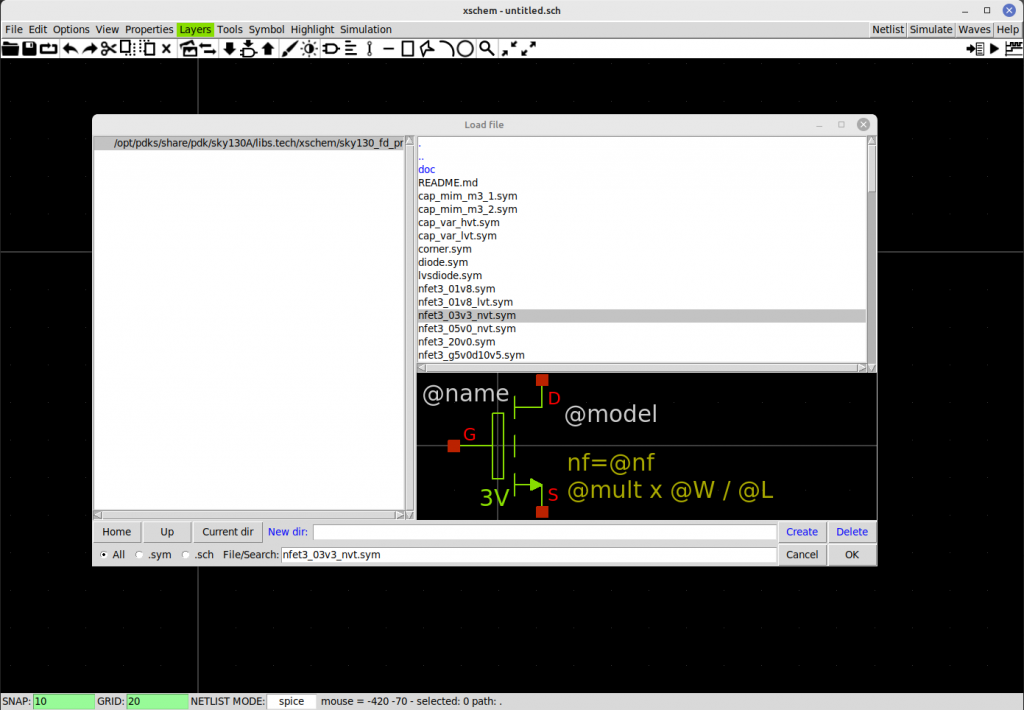
What Next ?
You can try one of these articles:
https://openroad.readthedocs.io/en/latest/main/README.html
https://openroad-flow-scripts.readthedocs.io/en/latest/tutorials/FlowTutorial.html